
Choosing a display hook starts with understanding the fixture it needs to fit.
Pegboard, slatwall, and gridwall use different mounting systems, and the right hook also depends on what will be displayed and how the finished display needs to function.
A hook that works well in one application may not physically mount to another fixture. Even when a hook fits the mounting surface, factors such as product weight, package size, and display location can affect which option makes the most sense.
Kinter’s Rocky Lunardi works with customers on display hook applications ranging from straightforward product selection to custom solutions.
This guide outlines a step-by-step process to help Kinter customers find the best hook for their application.
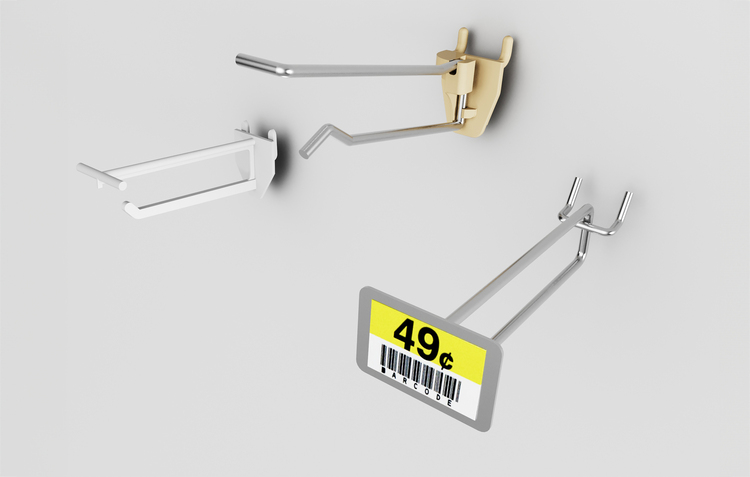
Display Hooks 101: What the Differences Actually Mean
Pegboard, slatwall, and gridwall describe the surface where a hook will be mounted, and each system holds hooks differently:
- Pegboard hooks mount into a pattern of holes in the display surface.
- Slatwall hooks mount into horizontal grooves. Some Kinter hooks are designed to work with both standard slatwall and pegboard.
- Gridwall hooks attach to a wire grid or crossbar, making the spacing and dimensions of the grid important when selecting a hook.
Pegboard and slatwall offer some crossover. Kinter’s Single Prong All-Wire Pegboard Hook, for example, is designed for common 1-inch-on-center pegboard and standard slatwall. Kinter also offers dedicated slatwall hooks with welded backplates for standard slatwall applications.
“Going with a dual-purpose hook gives customers a hybrid option that will work whether they have a pegboard or slatwall application,” says Rocky Lunardi of Kinter’s sales team. “Having the dual-purpose option is also useful for retail programs rolling out across stores with different fixtures.”
The Defining Answers Buyers Should Know About Display Hooks
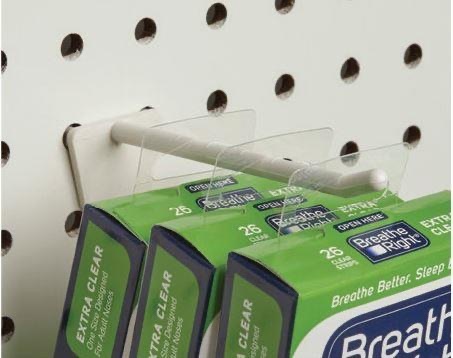
Knowing the mounting surface narrows the field, but Lunardi and the KinterCare team members typically want to understand the merchandise and the finished display before recommending a hook. A few application details can confirm whether the part will perform as expected once merchandise is added.
“One of the first questions I ask is pretty simple,” Lunardi says. “It’s not about the hook; it’s about what is actually being displayed.”
From there, several details matter:
- What product will be displayed? Weight helps determine whether plastic or metal construction is appropriate. A heavier product can cause an undersized plastic hook to sag or allow merchandise to fall.
- How large is the packaging? Package dimensions affect the usable hook length. A relatively small product can come in packaging large enough to substantially reduce the number of units fitting on the hook.
- How many products need to fit on each hook? Quantity adds to the total load and can change the appropriate material or hook construction.
- Does the display need pricing or scan information? Depending on the application, a hook may need to accommodate a paper price tag, electronic shelf label (ESL), or another form of product information.
- Where will the display be located? A hook exposed to carts or frequent shopper contact may need greater durability than one positioned in a less active part of the store.
Understanding the answers to the questions noted above can lead to a different recommendation than a customer originally expected. Lunardi recalled one application involving heavy winter socks, where a customer was considering small corrugated peg hooks.
“Initially, the peg hooks seemed like a potential fit,” he says. “But the weight of several pairs of socks would have caused the corrugated display to sag. With that product information, I was able to recommend a much more suitable hook for the display.”
Converting your store to electronic shelf labels? Kinter’s hooks can accommodate ESLs. Learn more in our blog, “Electronic Shelf Labels in Grocery—FAQs on Fixtures, Security, and Installation.”
Once the hook application requirements are clear, the next step is understanding the specific hook options available for each mounting system, starting with pegboard.
What Are Pegboard Hooks and What Are the Options?
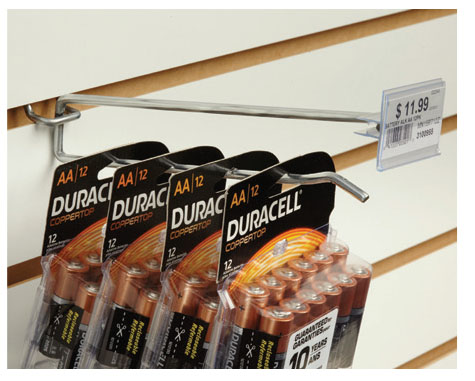 Pegboard remains one of the most familiar retail display systems. Standard pegboard commonly uses 1/4-inch-diameter holes on a 1-inch-on-center pattern, and Kinter offers pegboard hooks in both plastic and metal constructions.
The appropriate material depends on the application. Glass-filled nylon hooks can provide considerable strength at shorter lengths, while metal may be more appropriate as hook length or merchandise load increases.
Lunardi cautions against assuming plastic automatically means a weaker solution.
“Shorter plastic hooks can be surprisingly strong, and there are applications where choosing metal would add cost without providing a meaningful benefit,” he says.
Kinter’s pegboard options include:
- Standard hooks for hanging merchandise without an integrated pricing or labeling component.
- Hooks with a scan plate for adhesive-backed UPC labels, pricing, or product information.
- Hooks with a C-channel for data tickets, tags, or signs.
- Hooks with a T-scan bar designed to accept flip-style information strip label holders.
- Multiple stem lengths to accommodate different products and display requirements.
Kinter’s plastic scan plate, C-channel, and T-scan bar options are made from glass-filled nylon and designed to fit standard 1/4-inch pegboard holes as well as standard slatwall grooves.
Metal pegboard hooks provide another option when the application calls for additional length or strength. Kinter’s Single Prong All-Wire Pegboard Hook uses a welded back hook for stability and is available in multiple sizes and finishes.
Product weight should be considered along with the hook length. Lunardi notes plastic hooks in the 2-inch to 3-inch range can be relatively strong, while longer hooks are more likely to bend under load.
“Once the hook needs to be longer than about 6 inches, we’ll generally recommend looking at a metal hook for the application,” Lunardi says.
The overlap between pegboard and slatwall compatibility makes slatwall a logical next consideration, especially since some hook designs can be used with either mounting surface.
What Are Slatwall Hooks and How Do They Differ From Pegboard Hooks?
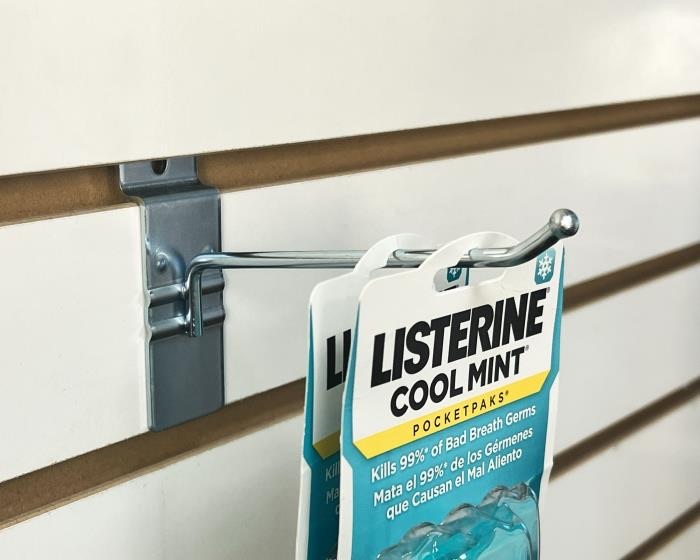
Slatwall uses horizontal grooves rather than pegboard holes, but Kinter offers several hook designs that can accommodate both mounting surfaces.
Many Kinter pegboard hook configurations are dual-purpose parts designed to fit standard pegboard and standard slatwall. The hybrid option can simplify hook selection when a retail program may use both fixture types.
Dedicated slatwall hooks are also available. Kinter’s Single-Prong Slatwall Hook, for example, uses a flat welded backplate designed specifically for standard slatwall. The backplate provides a physically different mounting design from the wire-style back used on combination pegboard and slatwall hooks.
Depending on the part and application, slatwall hook options can include:
- Standard single-prong configurations
- Scan plate options for displaying pricing or product information
- C-channel configurations
- T-scan bar configurations
The distinction between a combination hook and a dedicated slatwall hook becomes important when planning a rollout. A dual-purpose part provides flexibility when fixture types vary among stores. A slatwall-only hook requires the corresponding slatwall mounting surface.
The final hook category is gridwall, which offers a different mounting approach based on the spacing and configuration of the wire grid.
What Are Gridwall Hooks and What Are the Options?
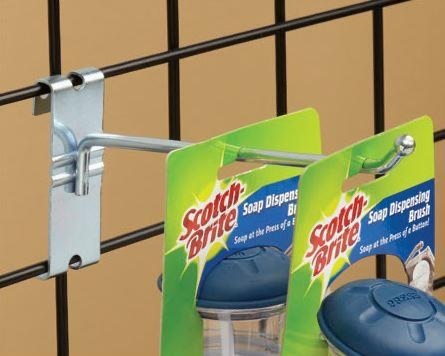
Gridwall requires a different mounting mechanism because the hook hangs from a wire grid or crossbar rather than fitting into a hole or groove.
Wire spacing is one of the first specifications Lunardi looks for when helping with a gridwall application.
“If you’re looking at a grid hook, we have to know the distance between the horizontal and vertical wires,” Lunardi says.
Kinter offers several approaches depending on the grid or crossbar configuration:
- Single Prong Metal Grid Hooks use a welded backplate notched to fit over center grid cross wires and are designed for both 2-inch and 3-inch metal grids.
- Curl Back Crossbar Hooks hang from 3/16-inch by 1-inch crossbars or 1-inch wire grids. A T-scan bar version is also available for applications requiring product or pricing information. The hooks can be used with Kinter’s Wire Power Wing for endcap merchandising.
- Corrugated/wire combination hooks provide another option when a hook needs to work with more than one display construction. Kinter’s Corrugated/Wire Combo Display Hook with C Channel, for example, uses an over-the-top back designed for corrugated and wire displays.
The physical dimensions of the grid or crossbar are critical because a grid hook cannot simply be selected based on appearance.
“For example, Kinter’s single-prong grid hooks can accommodate 2-inch and 3-inch grid spacing,” says Lunardi. “But curl-back crossbar hooks are intended for a different configuration.”
Understanding the differences in the three mounting systems provides a solid base for selecting the right hook for most applications.
How Do I Match a Display Hook to My Mounting Surface?
A display hook can be narrowed down quickly once the mounting surface and application requirements are clear.
|
What to Confirm |
Why It Matters |
|
Mounting surface |
Determine whether the display uses pegboard holes, slatwall grooves, gridwall spacing, or a crossbar. |
|
Product weight |
Weight helps determine whether plastic or metal construction is appropriate. |
|
Package dimensions |
Package size affects hook length and how many products can be displayed. |
|
Quantity per hook |
More merchandise increases the total load the hook needs to support. |
|
Pricing or scan requirements |
Scan plates, C-channels, and T-scan bars support different labeling applications. |
|
Display location |
High-traffic areas may expose hooks to additional contact from shoppers or carts. |
|
Existing fixture requirements |
Combination hooks or another mounting approach may be useful when working with existing displays or different fixture configurations. |
For unusual applications, a photo or sample can often answer questions that specifications alone cannot. Kinter customers can send product samples or images for review, and the team can provide sample hooks so the customer can see how an option performs on the actual display.
Lunardi also described situations where Kinter team members visit a store to see an application firsthand.
“Sometimes you can look at a picture all you want, but to actually physically touch it, see it and know where it’s going to be in the store, it really does make a huge difference,” he says.
Applications that cannot be solved with an existing part can move into a custom solution. Kinter’s custom retail display capabilities include custom hardware design, prototype development and 3D printing, along with manufacturing capabilities for plastic and metal components.
With hooks covered, does your project need fasteners? Check out Kinter’s “Fastener Selection Guide For Displays, Fixtures, and Industrial Applications.”
Where Can I Get Pegboard, Slatwall, or Gridwall Hooks?
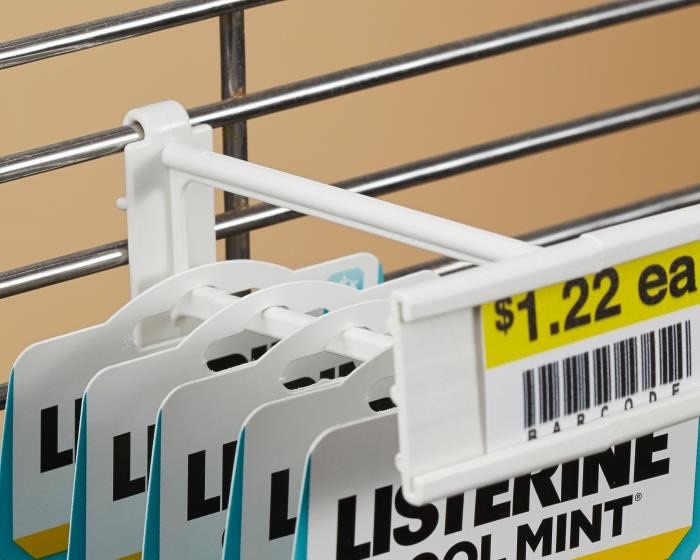
Kinter stocks pegboard, slatwall, and gridwall hooks, along with combination parts for applications accommodating more than one mounting surface. Kinter’s broad retail display hardware inventory includes more than 10,000 ready-to-ship items, with custom design and engineering support available when a standard part does not fit the application.
At Kinter, the hook selection process does not have to end with finding a hook in a catalog. KinterCare gives customers access to people who know retail display hardware and can help work through the application, confirm specifications or identify another option when the initial selection is not quite right.
Need help matching a hook to a pegboard, slatwall, or gridwall display? Contact Kinter to talk through the application and find the right mounting-specific option.